
You have probably all seen me rave about Make Up For Ever Face and Body foundation here but I had to bring it up again so I could add how great this product is for bronzing and temporary tanning.
I always start by prepping the skin well making sure I have a really clean well moisturised base to work from before I start applying makeup.
Following the base application I like to sweep the tiniest drop of Face & Body in a gorgeous nutty, tan shade (no.12 is usually perfect) across the apples of the cheeks, bridge of the nose and across the forehead using a dual fibre brush. I really work the product in blending with a light circular motion and build the colour where needed to get a flawless bronzed glow. Remember to pay attention to ears and necks too!
I find the the sheer, slightly dewy finish of the Face & Body gives a more natural tanned look as apposed to many traditional powder based bronzers. When used with a light touch you can let freakles show through too, adding to the natural finish we want.
I also follow the same procedure for the body, buffing a darker shade of Face & Body than I used for the base into the skin. I concentrate the colour where the sun usually hits most such as the shoulders, chest, outer arms, ect and blend, blend, blend, the colour outward.
As the Make Up For Ever Face and Body is transfer and water resistant you don't have to worry about the colour disappearing or ruining clothing which is a huge bonus!
Let me know what tips you have for getting a summer glow by leaving a message in the comments section below.
Tuesday, 14 July 2009
Tuesday, 30 June 2009
Sick Note :(
Sorry no post today! Ive hurt my wrist and havent been able to put together this weeks post for you all. Even typing this was a challenge but i will be back soon I promise....
Tuesday, 23 June 2009
9 Ideas To Help Your Money Go Further
Saving the pennies is something on every ones mind right now but even more so if you're a freelancer. I wanted to share some ideas to help us all make our money go a little further each month but would also love to here your tips too so remember to leave a comment!
1. Quit the gym! Summer is the perfect time to cancel your gym membership as you can make the most of the nice weather and start walking, running or cycling in the great outdoors. If it's the classes you love club together with some girl friends and buy some workout dvd's that you can all do together a couple of times a week. You'll get fit and have a laugh too! I love the Ministry of Sound workout series.
2. Sign up for as many pro discount schemes as you can. Click here to find out more.
3. Do your research so you can make educated decisions and get the most out of your budget when buying something new for your kit. Often impulse buys turn out to be a waste of money. Trawl makeup blogs, forums and sights like inmykit.com for recommendations.
4. Look out for discounts, multi-buys and budget disposable products and bulk buy. You can never have too many tissues, cotton pads, q-tips, wipes ect so stock up and save money in the long run if you come across a great offer.
5. Got something to celebrate? Lots of restaurants are offering great deals at the moment, particularly if you eat out mid week, so sign up to receive emails from your favourite restaurants and Google to see if there are any money off vouchers you can print off before you book a table for a special night out.
6. I recently discovered the designer outlet village, Bicester which is an hour away from me in Oxford. I now visit every few months to stock up on discounted products from Molton Brown, The White Company, The Cosmetics Store and Cath Kidston which I keep on hand for birthdays and any occasion that requires a gift. I rarely need to spend more than £10 on a gift (not that anyone would know) with a little though and some sensible shopping. Use Google to find your nearest designer outlet.
7. My latest money saving find has been Read It Swap It which you must sign up to if your are a book worm like me. The site puts you in touch with like minded people to swap your old books with and the best bit is all you pay is the postage. I just got The Private Lives Of Pippa Lee and only spent 90p at the post office!
8. I am a magazine junkie but have cut way back since discovering sites such as Design Scene, {a glamorous little side project}, deMode and Fashion-ation. I save images I want to keep for reference to my desktop and now I have a really great body of work to refer to when I need some inspiration.
9. Get yourself a Cafetiere, some really good coffee (no instant pls!), and some lovely big coffee cups and stop spending your hard earned cash in over priced coffee house chains. You can then have a gossip with your friends over coffee and a cake in the comfort of your own home.
Tuesday, 16 June 2009
Free Fonts to Personalise Your Marketing Tools
I recently came across a fantastic site, dafont.com, that lets you download hundreds of fonts and dingbats for free! I thought this could be a useful tool for those of you designing your website or business cards as the font you pick is such an important decision when branding your marketing materials.
The simplest way to tie your website, business cards and other marketing materials together is by using the same font through out so why not download an interesting font that stands out from the crowd and makes your cards a little more memorable.
So here is what you need to do…
1. Find a font to download by searching through the themed categories on dafont.com.
2. Click the ‘DOWNLOAD PC / MAC OS X’ button to the right.
3. Save the file to your desktop.
4. The files will be in a compressed folder so you need click 'Extract All Files'
5. It will give you an option to choose where the files are extracted to so send them too
C:\Windows\Fonts (if this doesn’t work try C:\WINNT\Fonts)
6. Now if you open a programme such as Word or Photoshop the font should be available for you to use.
Although there are lots of cool fonts for download be careful that the font you choose is still easy to read. It is so important that any information relating to your business, particularly contact information, is communicated in a clear, concise, easy to read format!
Another fun website for those who are interested in creating their own font is kevinandamanda.com so check them out too.
Be sure to check the 'Read Me' file that is downloaded with each font from dafont.com to check there are no restrictions on the use of the font you want to use!
Tuesday, 9 June 2009
10 Tips For Those Looking For Agency Representation
Many artists see getting an agent as one of their top career goals so what can you do to prepare yourself and your book to achieve that goal?
Kathy Aragon who has been through the process has kindly shared some insider tips for those who are working towards agency representation.
1. The work you have in your book needs to show that you add value to the agency so it is important to have, not only excellent test shoot images, but work from paid jobs and tear sheets too.
2. Your book should show the agency you have experience working on multiple sets with a full crew so they have confidence sending you on a variety of assignments.
3. Your portfolio should be immaculate and beautifully presented. Don’t take the words ‘tear sheet’ literally. They will ideally want to see a book full of neatly cut out full page tears.
4. Of course every agent is different but most will want to see you are confident producing clean beauty looks. Clean looks also show the agent that you know how to edit your work which is important.
5. When building your book ‘Say no to random stuff on the face.’ This opinion was shared by many of the agencies Kathy heard speaking at the Makeup Show in LA. No feathers, no rhinestones, no gold leaf when you’re testing.
6. Agencies can spot a bad or overdone Photoshop job a mile off and generally don’t want to see overly Photoshopped images from tests in your book .
7. Before approaching an agency it is really important to do your home work. They will want to know that you have studied their artists and their work and that it matches what you want to do with your career.
8. Assisting the artists at a top agency is a great way to start building your relationship with the agency. If you call to put yourself forward for assisting opportunities mention specific artists you would like to assist. This gives them an idea of the direction you want to take your work and your inspiration. Be sure to also make it known that you are available to assist all of their artists so they know you are willing to assist anyone they represent to prove yourself. They want to see dedication.
9. Once you feel your book is ready you need to start by calling the agencies you’re interested in to find out what their submission process is and whether they are adding artists to their roster.
10. Not sure if your book is good enough to take to an agency? As a guideline when you are ready your work should be in line with the other artists represented by the agencies you are approaching.
You can view Kats work at www.kathyaragon.com or follow her on Twitter @KatAragon
If you too have agency representation like Kathy or have recently shown your book to an agency please share your experiences and tips in the comments section as I would love to hear from you.
Wednesday, 3 June 2009
Dermalogica Ultracalming Cleanser 30% Discount
I'm a sure you have all see my rave reviews for Dermalogica's Ultraclaming cleanser but if you missed it the 1st time around click here....

The reason why I thought to revive this old post is that the lovely Marie from the I Love...The Obsessions of a Shopaholic! blog has a code for 30% off my favourite cleanser courtesy of the Jersey Beauty Company posted today.
Skip on over to I Love...The Obsessions of a Shopaholic! to get the discount code now!
Don't forget that if you are a pro mua you can apply to join the Dermalogica Insider Programme which also entitles you to pro discount.
Tuesday, 2 June 2009
Get Usable Image Files From A Test With These 6 Questions
A test shoot is a collaboration in which all parties involved should benefit from the pictures received. I don’t go in for contracts or think you should come across like a demanding diva when approached about a test shoot but you do need to discuss a few things with the photographer before the shoot so you can be sure what you receive later will be useful to you.
Here are some questions you should have answers to before any pictures are taken to insure that the image files you receive after the shoot are suitable for printing.
1. Can you get some close up shots of the makeup?
Always ask the photographer to get some close up shots of the makeup as part of the deal and remind them on the day that you need some head shots. A great beauty shot next to a full length image can look fantastic in your book and will show your skills as a makeup artist more clearly.
2. Can you start the day off with a really clean beauty look?
You should be focusing on clean beauty when you start building a portfolio so if you get roped into a test that doesn't involve clean beauty see if you can do a quick beauty look at the start of the day which you can build on after to achieve something more adventurous. This way everyone should get something usable for their books right from the start and you get more looks out of a days shooting.
3. Will you get Hi-Res files?
Make sure the photographer is going to provide hi-res files so you can print nice sharp images for your book. Low-res files are only suitable for posting online so they don’t take too long to load.
4. Does the photographer have watermarks on all his/her images?
If the photographer you are working with uses watermarks on his/her images check that getting files without the watermarks won’t be a problem so you can print the images for your book.
5. How many images should you expect to receive?
Discuss how many images you should realistically expect to receive and whether these files will have been retouched. Unless you are shooting a big editorial story it is unlikely that you would really need more that 5 images from a shoot.
6. Will you have any input into the final picture selection?
Often all parties involved are looking for something different for their books so it's great if you all have some input into the final image selection. If you are given a choice of images think about the composition in your book so the images you pick go together on a double page.
If you are unsure about any of the following points discuss them with the photographer in an email. Emails are great as it gives everyone a record of whats been agreed on to refer back to.
Do you have anything to add? Leave a comment below...
Thursday, 21 May 2009
The 3/50 Project
I have come across the 3/50 project on a few blogs recently and thought it was such a fab concept that I must spread the word and share it with my readers too.
Although the 3/50 project, which suggests you take $50 a month a spend it in three local, independent stores, is obviously geared towards helping businesses in America there is no reason why we cant all think a little more about where we spend our pennies and support independent retailers when we can. Read on to find out how the project works....

If any fellow bloggers would like to show their support for The 3/50 Project why not add their badge to your side bar? Click here to get your badge now.
Although the 3/50 project, which suggests you take $50 a month a spend it in three local, independent stores, is obviously geared towards helping businesses in America there is no reason why we cant all think a little more about where we spend our pennies and support independent retailers when we can. Read on to find out how the project works....
If any fellow bloggers would like to show their support for The 3/50 Project why not add their badge to your side bar? Click here to get your badge now.
Tuesday, 19 May 2009
Tried and Tested: Make Up For Ever Face & Body Foundation
 I am a big fan of the Make Up For Ever line of cosmetics and not just because of their generous backstage card discount! Their Face and Body foundation is definitely a 'go to' product for me as I use it on just about every shoot I work on.
Make Up For Ever are one of the few lines to carry such a wide range of colours. With a selection of about 4 - 6 shades in your kit from the lightest to the darkest you shouldn't have a problem mixing a base to match anyone that sits in your chair.
The MUFE F&B base probably wont be favoured by those artists that like to work with products that give medium to heavy coverage even though it is buildable but it suits my way of working and is a kit staple and pro favourite for many.
Rather than covering up the skin I prefer to work with a lighter weight foundation that enhances the natural beauty of the model by just evening out the skin tone which Face and Body is perfect for. Even if I am working with someone with a blemish or two I prefer to use the MUFE F&B and just conceal with a cover up where needed.
 The MUFE F&B has an unusual texture straight from the bottle as it is comes in a gel, emulsion formula which needs to be really shaken up to get the silky texture you need for a flawless application. After shaking well I find I get a nice finish by applying the F&B with a regular flat foundation brush roughly all over the face and I follow that by buffing it into the skin with circular motions using a dual fibre brush. You get a subtle dewy finish with this product which I like to combine with a dual finish powder to matt the t-zone and give slightly more coverage in that area.
As the product is transfer resistant and waterproof it is perfect for use on the body in all kinds of situations. I find it works wonders for evening out tan lines! You just need to wait for it to dry and remove any excess product with a tissue before dressing the model.
Although the face and body foundation does only give a light buildable coverage it photographs beautifully which is why I rarely feel the need to reach for another base. The moisturising properties make this foundation very forgiving on those with dry skin and I find it to be a real hit with brides. The natural looking dewy finish is silky to the touch and leaves skin feeling like it can breath which is prefect for bridal, particularly if you work with those who wear little or no makeup day to day.
You can see 4 examples where I have used Make Up For Ever Face and Body by looking at the first page of my website. Click here...
As you can tell I can do little but rave about this product although I would love to hear your thoughts good and bad so please leave a comment if you have something to share.
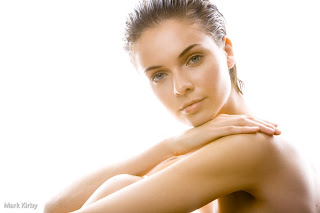
picture source: makeupforever.com/alexcollinsonline.com
Monday, 18 May 2009
A Classic Hollywood Make Over in 8 Steps
Sorry I have been MIA on the blog the past couple of weeks but I'm back and I wanted to kick start the week by sharing with you a guest post I wrote for the lovely blogger Laëtitia Wajnapel over on Mademoiselle Robot.

Over on Mademoiselle Robot I have posted 8 simple steps to help you achieve this classic Hollywood look with some tips thrown in for good measure.

The glamorous makeup looks of classic Hollywood stars have recently made a come back and are a real hit on the red carpet. When I was asked to write a guest post for Mademoiselle Robot I thought it was the perfect opportunity to share some of my tips for recreating the versatile vintage makeup look favoured by stars such as January Jones, Maggie Gyllenhaal and Kate Winslet. Click here to continue reading and find out how you can get the classic Hollywood look....
Subscribe to Mademoiselle Robot or Follow on Twitter and let Mademoiselle Robot help you find your own vintage style and fulfill all your most superficial needs!
Tuesday, 5 May 2009
Long Lasting Makeup
I mentioned on Thursday the importance of using makeup for longevity when working with brides and thought I would elaborate by sharing some tips on getting makeup to last.
Preparation is key
By prepping the skin correctly you can increase the life of your makeup application and keep your bride happy all day.
- Give moisturiser time to be absorbed into the skin so you have a good canvas to work from and your makeup wont slide off.
- Using a good primer will prep the skin for foundation and should increase the longevity of your makeup.
- An eye primer will not only give your eyeshadow more staying power and stop creasing but the shadow should appear brighter and true to the colour in the pot as well.
Setting the makeup
Setting the makeup with a good translucent powder that doesn't change the texture or colour of your foundation is probably the most important step to extent the life of your makeup application.
When applying foundation and powder don't cake makeup on or think you need more coverage because the makeup has to last. A light application will last longer and look more fresh throughout the day. Using a powder puff with some loose translucent powder, press and roll the puff to set the makeup and reduce shine paying attention to the t-zone. Dust off any excess with a powder brush.
Long lasting lip colour
There are several techniques for getting the most out of your lip colour so here are a few you can try.
- Use a clear lip liner to create a barrier to stop lip colour from bleeding.
- Try filling in the lips with a matching lip pencil before applying lipstick to extend the wear.
- Apply lipstick, blot and reapply to give the lip colour more staying power.
- Use a lip stain to colour the lips and add a coat of lip gloss over the top to add shine.
Waterproofing
You don't want a teary moment to ruin the makeup for the rest of the day so make sure the products you use around the eyes are not going to budge with a few tears. Carry a good waterproof mascara and switch kohl pencil for gel, cream and waterproof liquid liners.
I hope you found these tips useful as they not only apply to bridal makeup but any makeup job that requires the makeup to last for long periods of time.
If you have any secrets for getting makeup to stay put share them with us in the comments section.
Friday, 1 May 2009
Revlon False Lash Giveaway Winners!
Drum roll please!!!! Its time to announce the 2 winners of the Revlon Fantasy Lengths Lashes competition..................
 Thank you for your entries girls, I really enjoyed reading all the comments left and hope you will both enjoy playing around with your loot! Please email me your addresses and I will pop your winnings in the post.
I have a competition coming soon for all my international readers who couldn't enter this time so watch this space!
Winners were selected via Random.org
Thursday, 30 April 2009
Makeup For Brides
I love doing makeup for brides and as it is often referred to as many artists ‘bread and butter’ I thought I would give you some points to think about if you are interested in getting into this area of makeup.
Use products for longevity – The makeup needs to go from day to night and continue to look flawless for hours so be sure to use products that are going to last.
Give basic skin care advice – Lots of people don’t know the importance of good skin care so be prepared to reiterate that looking after their skin in the run up to the big day will help them achieve the glowing radiant look just about every bride is looking for. If you have a good canvas to work from your job will be much easier on the wedding day too.
Don’t forget the rest of the body – Remember pictures will be taken by guests from every angel so check the makeup from all angles and be sure to conceal any blemishes on the chest or back if the dress shows some skin. Some body lotion and hand cream will bring the skin to life and make the bride feel even more pampered on the day.
Be confident – You don’t want to be pushy but having a confidence about you will put your clients at ease and give them confidence in you and your skills making them more open to your ideas and opinions. Your bride will also be more relaxed if you look like you know what you’re doing.
The trial – The consultation before the wedding is really important so make sure you never skip the trial. Meeting the bride before the day gives you both a chance to decide on the look so the wedding day runs smoothly and most importantly you can be sure that none of the products you use cause a reaction. If any irritation occurs it will have time to calm down.
Keep a book of tears – It is good to have a small book of makeup looks that you can go through with those brides that don’t have any pictures for you to use as a starting point. One bride’s idea of a natural look can be extremely different to the next so it is important to make sure you are both on the same page from the start.
Touch up kits – If a touch up kit is not included in the makeup package you should talk the bride through products that can be purchased to maintain their look, such as a powder compact for shine control.
You need to be good at gentle persuasion – You should never be pushy when working with private clients such as brides and always remember that at the end of the day they are paying you to give them the look they want. The bride owns their look and should always feel comfortable in their own skin. Never try to force a look you think is best on someone but a good artist should try to steer them into making the right choices and to try new things.
Don’t cheapen your skills – Google bridal makeup artists in your area, set your prices in line with those in your market and stick to them.
This is probably the most important day of your brides life so its your job to be a calming influence and get the job done to the best of your ability and with as little fuss as possible. Having their make done on the big day should be a fun relaxing experience.
Leave your thoughts on bridal makeup and dealing with brides in the comments section!
Tuesday, 28 April 2009
Nail Kit and 10 Step Manicure for Makeup Artists
As makeup artists our job doesn’t end once the face is done, the appearance of the body as a whole is our responsibility. When it comes to the hands and feet you should at the very least be making sure the nails are clean and tidy but a quick manicure or pedicure could be in order particularly when shooting beauty or if the models nails are in poor condition.
Here are some products you should carry in your nail kit:
Soft Toothbrush
Small Bowl
Nail Clippers
Emery Boards
Buffer
Cuticle Oil
Cuticle Pusher/Orange Sticks
Cuticle Clippers
Nail Polish Remover – Must be oil free and suitable for both natural and fake nails.
Lint Free Nail Wipes
Pumice Stone
White Nail Pencil
Sanitiser (available at beauty supply stores)
Hand Cream
Top Coat
Nude Polish
Red Polish
2 or 3 Trend Colours
Check out this fab Tweezerman nail kit as a starter set.
10 Steps to achieve the perfect manicure.
1. Remove any old polish. By using lint free nail wipes you won’t get little bits of cotton wool flying around which can get stuck in your polish when painting the nails later!
2. Apply cuticle oil and soak in warm soapy water if required.
3. Gently push back the cuticle using either a cuticle pusher or an orange stick and remove any excess cuticle with the clippers. It is probably a good idea to practice this on yourself so you don’t hurt the model or cause any damage to the nail bed when working on others.
4. Shape the nails with an emery board. Nail shapes change over the years so pay attention to what is in fashion.
5. Lightly buff the nails to prep the nail, remove ridges and bring out shine.
6. Clean off the nails paying attention to under the finger nails with your soft toothbrush and bowl of water.
7. For a natural manicure dip the tip of your white pencil in water and use to whiten the underside of the nails. You can follow with a dry cotton bud to soften the look or even transfer the white from the pencil to the cotton bud and use the bud instead of the pencil to whiten under the nail for a softer look.
8. Clean the nails to prep for the polish by wiping with an oil free polish. Use your lint free wipes to help you achieve a flawless finish when painting.
9. Paint the nails paying close attention to the sides so there are no gaps and follow with a top coat for added shine and finish.
10. Finish up by using hand cream to bring life to the hands and improve the general appearance.
As you know time is always of the essence when working so practice on as many people you can to get your speed up and remember to sanitiser your tools after each use as you would with your brushes!
Monday, 27 April 2009
Revlon Giveaway!
 It may be a grey, miserable Monday morning here in London but I have something to brighten up your day....
Two lucky readers can win 4 pairs of Revlon Fantasy Lengths Lashes each this week and all you have to do to enter is leave a comment telling me why you you would like to win the Revlon Fantasy Lengths Lashes!
The competition is only open to UK residents on this occasion and entries must be received by 10am GMT Friday 1st May 2009. The winner who will be selected at random will also be announced Friday 1st May 2009. The winner will receive a selection of lashes from the Revlon Fantasy Lengths range so the lashes received may differ from those in the picture above.
Wednesday, 22 April 2009
Happy Earth Day from What The Pros Do!
 I hope you are all doing your bit for the planet even more so than usual today as it is Earth Day!
Why not take a moment to hop on over to The Coveted where Sonja has posted some fab Earth Day Beauty Deals for you to enjoy.
This gorgeous Earth Day illustration is by Helen Dardik who blogs at Orange You Lucky! so make sure you stop by and show her some blog love too this afternoon.
Tuesday, 21 April 2009
7 Do's and Don'ts for Networking Online
It is so easy to connect with other makeup artists, photographers, stylists, models and hairstylists now there are so many online networking sites you can join. Although networking online can be fun its important to still treat your online profiles as a marketing tool and keep some professionalism if you are using a profile to help grow your makeup business. I should also point out that an online networking profile is never an alternative to having your own website!
I think it really helps to concentrate your efforts on 1 or 2 sites and build your presence before joining yet another networking site. Networking online works best when you take the time to be an active member of the communities you join so I think it is important not to spread yourself too thin and build up the number of networks you contribute to slowly if you want to see results from online networking.
Here are some do's and don'ts that will help you if you are setting up a makeup profile on a networking site.
Do - Keep in mind your goals for being on the site and focus your networking to achieve those goals.
Don't - Set up so many different profiles that you don't have the time or energy to keep them all up to date.
Do - Be an active member of the networking sites you sign up to. This means spending 15mins or more a day to comment on other members work, contribute to forums and replying to those that have reached out to you. This all helps to get your name out there and builds your profile.
Don't - Turn your bio into an essay. Keep it short and sweet but make sure you get across who you are, what you do, why your on the site, how you can help the person reading your profile and how you can be contacted. That's it. Many networking sites are quite informal so you can be relaxed and light hearted with your bio but keep a professional element to it as you never know who's reading.
Do - Keep your profile positive. I see so many profiles that focus on what the person doesn't do, doesn't like and doesn't want to be involved with that you come away with a negative impression. No one wants to surround themselves with negative people so try to come across as someone others would enjoy working with.
Don't - Use a cute name for your profile always try and use your real name so people associate your work with you and nothing else.
Do - Edit your work in the same way you would edit your book, quantity doesn't equal quality.
Model Mayhem, Who Is Testing, Iqons, Dripbook, Facebook, Myspace, Net-Model, Purestorm and Twitter are all networking sites you can join but I would love to hear if you use any other sites for networking and which sites are working for you so please let us know where you are networking by leaving a comment.
I would also love to hear your tips so please share your do's and don'ts for networking online in the comments sections.
Monday, 20 April 2009
Blogs to Bookmark: {a glamorous little side project}
{a glamorous little side project} is a collection of fashion pictures and editorials posted by the blogger behind {this is glamorous}.
 A great resource for inspiration {a glamorous little side project} is definitely worth a bookmark. Here are a few of my favourite shots posted recently...Enjoy!


A great resource for inspiration {a glamorous little side project} is definitely worth a bookmark. Here are a few of my favourite shots posted recently...Enjoy! Eternamente Inocente, Vanidad April 2009 by Esperanza Moya
Editorial: And God Created Woman; Model: Abbey Lee Kershaw; Photographer: Max Doyle; Stylist: Naomi Smith; Magazine: Vogue Australia May 2009
Editorial - Haute Bohème, Model - Inguna Butane in Vogue Germany April 2009
Stop by {a glamorous little side project} and let me if you feel inspired by leaving a comment.
Picture Source: {a glamorous little side project}
Thursday, 16 April 2009
Prim Magazine
Apologies for the lack of posts this week! Why not keep yourselves amused until I'm back next week by flicking (virtually) through the new April/May issue of prim.Magazine.
This is my favourite editorial from the issue.... Enjoy!


Credits:
Let me know what you think of prim.Magazine, its editor is only 14 believe it or not! If you have any favorite online magazines please share them in the comments section.
This is my favourite editorial from the issue.... Enjoy!
Credits:
Photographer, Teneshia Carr
Stylist, Katie Burnett
Makeup, Maria Papadopoulou
Hair, Graham Tilley @ SLR
Let me know what you think of prim.Magazine, its editor is only 14 believe it or not! If you have any favorite online magazines please share them in the comments section.
Tuesday, 14 April 2009
When Inspiration Strikes: Signe Vilstrup
Yesterday, Ez over at Creature Comforts, posted this beautiful collage showcasing the work of Danish photographer Signe Vilstrup. I thought these shots where so beautiful I just had to share them with you all here too.


 Wouldn't you love to have work like this in your book?....I know I sure would.
Wouldn't you love to have work like this in your book?....I know I sure would. Ez often features beautiful photography on her blog so why not take some time to explore Creature Comforts next time you need a little inspiration.
Let me know what you think of Signe Vilstrup's work and which photographers are inspiring you right now by leaving a comment.
Picture Source: Creature Comforts (Photographer, Signe Vilstrup)
Sunday, 12 April 2009
Happy Easter!
 I hope you are all having a fantastic weekend whether you are celebrating Easter, Passover or just gorging yourself on chocolate!
I have been using the long weekend to work on some new features, post ideas and a few changes to the blog design which are coming soon so watch this space...
This gorgeous Easter card design is available to download for free on Benign Objects.
Thursday, 9 April 2009
Top 10 Pro Discount Schemes
As you can probably tell from the Building Your Makeup Kit posts, putting together a pro kit is a huge investment so its good to know that there are some really great companies out there supporting makeup artists by offering Pro Discount schemes.
Pro Discount
Here are 10 pro discount schemes that UK makeup artists can apply for.
(many are open to international readers too!)
1. Make Up For Ever Backstage Card - 35% Discount (contact PAM to apply)
2. Yaby Cosmetics Industry Discount Scheme - 20% Discount.
3. Bobbi Brown - Discount available via Selfridges London, Trafford Park and Exchange Square.
4. Aveda Creative Connections Programme - 35% Discount.
5. Louise Young Cosmetics - 25% Discount.
6. Dermalogica Insider Programme - 30% Discount.
7. Face Atelier Preferred Pro Programme - £40% Discount.
8. Camera Ready Cosmetics - Include your website when opening a new account to be approved as a pro and receive selected products at a discount.
9. Temptu Pro Artist Programme - Up to 30% Discount.
10. OCC Cosmetics - 20% Discount on cosmetics.
Many of these companies also run editorial credit programmes so if you're getting published don't forget to enquire about editorial schemes too!
Pro ID
When applying for discount you should expect to be asked to prove you are a working artist. In fact whenever I email a brand asking if they offer discount to pros I attach a call sheet and my union card before being asked to show I have a legit enquiry.
I know getting together proof your an artist can be tricky when your starting out (even though you probably feel you are most in need of a discount!) however it is possible to prove you are a makeup artist even if you're new to the industry.
Here are some items you can use to prove your credentials including tips of where to get proof as a new artist. You would usually need to provide 2 types of ID.
Business Cards/Comp Card - If you don't already have business cards you can get simple inexpensive cards online.
Tear Sheet - Supply a copy of an editorial page that has your name printed in the credits.
Call Sheet - A call sheet provides information such as your call time and location, listing everyone involved in the shoot, their contact details and department they are working with. Call sheets are also used in film and TV so working on a low budget short film can be a good way to get your hands on this item of industry proof when your a newbie.
Union Card - You can join BECTU (Broadcasting, Entertainment, Cinematography and Theater Union) for as little as £10 a month which gives you entitlement to a whole range of benefits and your union card can be used to prove you are a pro artist. This is great if you are a new artist with no tear/call sheets under your belt.
Website - Several brands now accept a website as proof you are a pro as it shows you are more that just a hobbyist and are serious about your career. I have said before that a website is a must in this day and age for any artist especially now there are so many inexpensive ways to set up and maintain your own site. Now you have another excellent reason to set up a web page even if its still early in your career.
Programme/Press Material - If you don't have your name in print yet try volunteering at your local amateur dramatics society and get your name printed in the shows programme crediting you for makeup.
Letter of Reference stating employment on business or agency headed paper - In some cases you can get someone to write you a letter of reference. This might apply if you work in a makeover studio for example.
If you would like to share other pro schemes or your tips for getting pro id together please post in the comments section. If your posting from outside the UK please state which country you are getting the discount in so there is no confusion. Thanks
This information was correct to my knowledge at the time this was posted but is subject to change at any time!
Tuesday, 7 April 2009
Building a Makeup Kit: Part 5
The Building a Makeup Kit mini series looks at brushes today. Please take a look at Parts 1, 2, 3 and 4 for more on what items to stock your kit with.
Brushes
Brushes are a personal purchase depending on the products and techniques you use in your work. Every artist will have their favorite go to brushes that they use on every job. You want brushes that feel soft to the touch so they don't irritate or hurt the skin when blending, you don't want brushes that shred lots of hair and you should get quality brushes that will last for a long time with a little TLC.
My kit has a variety of brushes from brands such as Kryolan, Ben Nye, MAC, Crown, MAP and Charles Fox. I haven't given any specific brush recommendations in this post but here is a picture of the staples in my kit to give you an idea of the shapes you should be looking for.

1. Foundation - I like a flat foundation brush for applying the foundation and a dual fibre brush for blending and buffing it into the skin for a flawless finish. I also have a small flat brush that looks like a giant eyeshadow brush for blending around the eyes and nose when needed.
2. Concealer - Small, flat, dense synthetic brushes for concealing under the eyes and a tiny thin brush for blemishes and more detailed concealing work.
3. Powder/Blush/Contour - Large tapered brush which is slightly flat for pressing powder into the skin, large rounded brush for blush and large angled brushes are perfect for contouring or blush.
4. Eyeshadow - You need a selection of eye shadow brushes, flat for pressing colour on to the lid, small and fluffy for blending and rounded brushes for contouring in the crease.
5. Liner/Mascara/Brows - You need to find the technique and brush that works for you when lining. I use either a small dense angle brush or thin liner brushes either straight or bent at an angle. You can use the tiny fan brush for painting the bottom lashes so if you haven't tried this trick for mascara give it a go. A grooming tool for coming the brows into shape is a must and a dense angle brush for filling in.
6. Lips - Find yourself the size you find easiest to work with which gives a nice clean line when working close to the lip line.
Don't feel restricted to use brushes only for the purpose printed on the handle. I have a shadow brush for lipstick, a lip brush for concealer....you get the picture.
If your building a brush kit from scratch a good place to start would be with a starter set from a pro store or good makeup brand that sells brushes. You can then build on your collection over time by adding different shapes, sizes and brands to your brush kit.
It is a good idea to have duplicates of your favourite brushes so you don't have to worry about cleaning between models but if you only have 1 set to start with make sure you have a good brush cleaner that sanitises your brushes and drys fast.
If you have anything to add on brushes for your kit share it with us and leave a comment!
Monday, 6 April 2009
Links to Love: TheMakeupArtist.com
 Makeup artist Mary Erickson is a fountain of knowledge when it comes to the makeup business. She kindly shares this knowledge compiling the answers to those burning questions you have when starting out in the industry. I definitely found this a great resource when I was finding my feet in the makeup world.
Mary gives her thoughts on topics such as choosing a makeup school, what's expected of you when assisting and how to find work. She has also put together an excellent resource of industry terms you should definitely get to know.
Thursday, 2 April 2009
Building a Makeup Kit: Part 4
Part 4 of the Building a Makeup Kit mini-series talks through the extra little essentials you should carry in your new kit as well as all the disposables you will need.
Click to see Parts 1, 2, or 3
Tools
Good tools are a great investment as they should last a really long time. If you have to start out with the budget option look into investing in an upgrade when you have the money and you will see the difference in quality and performace.
Makeup Sharpener
Eye Lash Curler - I like the traditonal metal curlers. Try Japonesque or Boots/Sephora for a cheeper alternative
Tweezers - I think Tweezerman's wide grip tweezers are the best on the market and worth every penny. Get them in a bright colour so you can always find them in your kit.
Brow Grooming Tool - I like the C162 from Crown which has 3 tools in 1.
Spatula - for scooping out product. Available at any pro makeup or beauty supply store.
Scissors
Disposables
You will find you get through tons of disposibles so its great buying in bulk and restocking your kit from a supply at home as and when you need to. It can also be more cost effective this way.
Mascara Wands
Cotton Pads
Tissues/Kitchen Towel
Q-Tips
Extras
Small Hand Towel - I set my kit up on a small hand towel so I know I always have a clean surface to work from. It also protects the surface im working from and saves time cleaning my station at the end of the day.
Palette - The Yaby compacts have a palette to work from build in which I love! If your on a budget a white tile gives you a nice surface to work from and most places selling tiles have samples that would be perfect.
Hand Sanitiser
Nail Kit
A small nail kit is a great addition to your kit. I have a set I picked up in Sephora that rolls up which is perfect for travel. You dont need to do a full manicure before a shoot but you should be aware of the hands and make them look presentable.
A good remover is essential for your kit as often models will arrive with polish on from the previous days shoot so you need to be able to clean the nails at the very least. I always use a hand cream which makes the hands look more alive and if the hands will be in shot, particually for beauty work a file and lick of polish will add finish to your work.
File
Clippers
Cuticle Sticks
Polish - Clear, Natural, Red (I love Boots No.7 Nail Brightner which is a natural colour polish which also brightens to make the nails look really healthy)
Hand Cream
Polish Remover
If you have an essential tool or piece of kit you can't live with out share it with us in the comments section.
Tuesday, 31 March 2009
Building a Makeup Kit: Part 3
Here is part 3 in the Building a Makeup Kit mini-series which this time focuses on lips and cheeks.
This post should give you an idea about which products will get you off to a good start when building a makeup kit and I have included suggestions for products I would get if I was building my kit from scratch.
Again, as in part 1, and part 2 I have selected these products because I feel they offer value for money, quality and performance.
Lip Colour
If you carry a good selection of lip colours from the palest nude to a deep cherry it should give you a good base to build upon. It is important that you learn to mix your products when starting out with a small kit so you are always confident that if you don't have the exact colour you want you can mix it.
I think the Yaby lip colours are excellent as they are very pigmented and the texture is nice to work with as they glide on and are very silky. As with the eye shadows, you can carry many colours without taking up lots of space and working from a palette all the colour options are to hand which saves you rummaging round in a bag full of tubes.
Yaby Palette $15.50 - 20 well
Lip Colours $3.75 each - LC013/020/060/181/198/231/237/246/255/277/319/414/025/066/129/165/184/208/233/267
If you want to create unusual lip colours Make Up For Ever Flash Colours are a favourite amongst makeup artists for this purpose. You can also mix the flash colours with gloss or lip stick to adjust the colour when you don't have the exact shade you need.
Lip Liner
A clear lip pencil that prevents bleeding and feathering when working with dark colours is all you need at first. If you like working with lip liners you can then build a collection from there.
Urban Decay Glide-On Lip Pencil £8.32 - Ozone
Lip Gloss
Start your lip kit with a good clear gloss. If you want coloured glossy lips either lay down a lip colour first and apply gloss over the top or mix your clear gloss with some lip colour to get a tint.
This is one area where you can probably save some money and find a drug store brand gloss that works for you so shop around but my gloss of choice is Bobbi Brown as it is doesn't wear off too quickly and has a really high shine formula.
Bobbi Brown Crystal Lip Gloss £11.74
Blush
La Femme blushes blend well, are highly pigmented and inexpensive so the palette Mary, at Camera Ready Cosmetics has put together is the perfect blush kit with a colour range to suit anyone that sits in your chair.
La Femme 12 Colour Blush Palette $39.00
All prices were correct at the time this was posted and do not include any pro discount that may be available to you.
If any other artists reading this have lip or cheek product suggestions feel free to share them with us and leave a comment.
Monday, 30 March 2009
Blogs To Bookmark: Design Scene
Keep up to date with the top editorials and advertising campaigns from around the world with the Design Scene blog. Design scene is an excellent research and inspiration tool which I love for keeping up to date with the international titles I cant always get my hands on.


Which blogs do you think I should bookmark? Let me know by leaving a comment.
Friday, 27 March 2009
Links to Love: Makeup Shopping!
As we have been discussing what to buy when building a professional makeup kit I thought it fitting to share with you my five go to sites when shopping for makeup as my Links to Love this week.
 Huge range of brands such as Benefit, Japonesque, Urban Decay, Philosophy, Nars and Stila as well as top skin care brands and hair care and styling products all under one roof.
 UK stockist of Make Up For Ever and Zuca amongst other pro brands.
HQhair
Huge range of brands such as Benefit, Japonesque, Urban Decay, Philosophy, Nars and Stila as well as top skin care brands and hair care and styling products all under one roof.Makeup Provisions
UK stockist of Make Up For Ever and Zuca amongst other pro brands.Yaby Cosmetics
 Excellent range of high quality palatalised makeup.
Camera Ready Cosmetics La Femme, Graftobian, Keromask, Cinema Secrets and many more pro brands
Screen Face
 Special FX products and brands such as Kryolan, RCMA, Embryolisse and Ben Nye
Excellent range of high quality palatalised makeup.Camera Ready Cosmetics
La Femme, Graftobian, Keromask, Cinema Secrets and many more pro brandsScreen Face
Special FX products and brands such as Kryolan, RCMA, Embryolisse and Ben NyeI am sure there are plenty more international stores that you all love so post your favorites in the comments section so we can turn this into a great shopping resource!
Tuesday, 24 March 2009
Building a Makeup Kit: Part 2
Here is part 2 in the Building a Makeup Kit mini-series which this time focuses on products for the eyes.
This post should give you an idea about what is needed for your kit when starting out and I have included products suggestions which are all items I would pick if I was building my kit from scratch. Again, as in part 1, I have selected these products because I feel they offer value for money, quality and performance.
To see Part 1 click here...
Eye Shadow
If there was one thing I wish I had know about when investing in those first few pieces for my kit it would be Yaby. I wont rave on too much about the brand here because I guess that's a whole other post but everything about the brand to me is ingenious.
Eye shadows are one product you could pretty much go on collecting for ever with all the different colours and finishes out there but if I was starting over I would firstly put my money in to Yaby shadows. The Yaby palettes which are 14.4cm x 10.8cm include 40 colours which are about the size of a 5 pence piece (or a dime i think?). I get the impression that some people are put off by the size at first but that's the best thing about these palettes. A little also goes along way as the shadows are very pigmented so there is no need for larger pans and you can carry a wide selection of colours without taking up space in your kit.
At the current exchange rate 1 of these palettes of 40 colours is aprox £60. That is the equivalent of 6 MAC shadows. Not bad huh?
Yaby $110 - Dramatically Neutral
Yaby $120 - Best of Both Worlds
Ideally you could get both palettes but I know that's not always the case so if I had to chose between the two I would get the Best of Both Worlds and add these 3 quads from Revlon for a good selection of neutrals.
These 3 quads from Revlon are a great for bridal, natural makeup looks and smokey brown eyes. I cant give these up as they are really useful flattering colours on just about everyone, plus the price is excellent value (usually on 3 for 2 at Boots) so I would definitely recommend you add these to your kit especially if you are building a kit on a tight budget.
Revlon Colour Stay 12 Hour Eye shadow Quads £7.82 each - 03 Natural Khakis, 06 In The Buff, 12 Price Less Metals
If you are using cheap shadows that are not very pigmented and you want to keep them in your kit try using a Primer such as Urban Decay Eyeshadow Primer Potion £9.30 to get good intensity of colour and make sure it stays put.
Brows
Brows are such an important feature and should not be overlooked. Neat groomed brows will add polish to your work and complete the look by framing the face.
I have these neutral eye shadows in a separate quad palette which I use for brows. They are great for filling in brows whilst still looking natural and the colours can easily be layered to get a good match for your client.
MAC Eye Shadows £9.79 each - Brule, Symmetry, Charcoal Brown, Carbon
Hairspray or Gel on a clean mascara wand can be used instead of a brow gel to groom brows on a budget.
Eye Liner
You will probably find black the most useful liner to have in your kit when starting out. You can use eyeshadow with an angled brush if you need another colour such as brown or grey for a soft liner or mix in a sealer (ScreenFace £4.40) or transforming gel with any colour shadow to create a liquid eyeliner.
MAC Fluid Line £10.77 - Blacktrack (long lasting, smudge proof precise lines)
MAC Kohl Pencil £10.77 - Smoulder (soft, smudgy, smokey lines)
Lashes
I think that many of the more expensive mascaras on the market perform well because of the wand used to apply it. When starting out find an inexpensive mascara that works well when using disposables. I also think its good to have a couple of pairs of strip lashes in your kit, one natural pair to add length and one more glamorous fuller pair should be a good start.
Maybelline Volume Express £4.88 - Black, Black Waterproof
Eylure Naturalite False Lashes - 101, 070
Duo £9.74 - Surgical Adhesive
Your Duo Surgical Adhesive can also be used to stick pretty much anything to the face and body.
All prices were correct at the time this was posted and do not include any pro discount that may be available to you.
If any other artists reading this have product suggestions for the eye area please feel free to share them with us and leave a comment.
Related Posts:
Top 5 Tips for Keeping Your Makeup Kit Clean and Sanitary
Go Green With Refillable Makeup Palettes
Top 3 Products Seen Backstage at Fashion Week
Monday, 23 March 2009
Building a Makeup Kit: Part 1
What exactly do you need if you are just starting to build a professional makeup kit? This week I am going to post a mini-series of posts that cover all the products needed to get you started.
Building a makeup kit is a huge investment and with the amount of products on the market it can be hard to know where to start. I know I made mistakes, which looking back was money down the drain due to impulse buys and bad choices.
All the suggestions I have made here are products I would invest in if I was starting over, taking into consideration value for money, quality and performance.
Skin Care and Prep Products
You want products that are going to work on a variety of clients that are unlikely to irritate the skin. Moisturisers should be easily and quickly absorbed.
Moisturiser – Embryolise £14.68
Toner – Body Shop Aloe Calming Toner £6.35
Tissue Off Cleanser/Eye Makeup Remover - Dermalogica UltraCalming Cleanser £17.30
Makeup Wipes – Sainsbury's Cosmetic Wipes £1.45
Vaseline – For prepping lips £1.15 at Boots
Moisturising Body Lotion - Vaseline Intensive Care Aloe Fresh £2.45
If you are doing bridal or any job that requires the makeup to last add a good primer such as Smashbox Photo Finish £26.75 to your kit.
Foundation
This is one area of your kit you do not what to skimp on and I would definitely advise you go for a pro brand over a drug store product so you can be sure that the base you chose will read well on camera.
It is also important to know that you don’t need to carry all the colours under the sun. A competent makeup artist should be able to mix the right shade for any client from a small selection of bases.
The foundation you use in your kit is quite a personal choice so you need to play around with as many brands as you can get your hands on to find out what is right for you.
I prefer working with liquids and find that MUFE performs really well for me. Here is a list of shades that would build an excellent starter kit for covering a wide range of skin tones.
Make Up For Ever HD £27.03 each – 110, 120, 140, 155, 170, 180
Make Up For Ever Face & Body £22 each – 02, 12, 26, 48
If you prefer cream bases the RCMA Sampler Palettes in Shinto $60 and KO $60 should cover everyone that sits in your chair and is a favourite of many artists.
Graftobian, Cinema Secrets, Face Atelier and Yaby are also popular brands amongst pros.
Concealer
You need a concealer of a consistency that you find easy to work with which blends nicely and gives good coverage for dark circles and blemishes. As with the foundation try out as many as you can to see what works for you.
The following shades should give you a good range of colours that can be mixed to get the shade you need.
MAC Select Cover-Up £10.77 - NW15, NC20, NW20, NW30, NW40, NW50
Setting Powder
Powder is essential for setting your makeup and counteracting shine. There is a whole array of powders on the market but a good translucent loose powder is all you need to get started.
Ben Nye's Neutral Set £4.99 is perfect for this.
All prices were correct at the time this was posted and do not include any pro discount that may be available to you.
If any other artists reading this have product suggestions please feel free to share them with us and leave a comment.
Related Posts:
Top 5 Tips for Keeping Your Makeup Kit Clean and Sanitary
Go Green With Refillable Makeup Palettes
Top 3 Products Seen Backstage at Fashion Week
Blogs to Bookmark: Design Is Mine
 A good artist of any medium takes inspiration from everything they see, feel and touch around them even if they are not conscious of it all the time.
Design Is Mine, often gets the creative juices flowing for me, particularly with Summer Allen-Gibson's '10 pictures of inspiration' posts. The Props, colours, locations and even the mood of the images she showcases often spark an idea in me even if its not a fashion or beauty related post.
Creatives soak up ideas, thoughts and feelings associated with images all the time and often its more productive to be inspired by a piece of art that has nothing to do with makeup or fashion.
I'm sure we have all seen a photo or editorial that literally stops you in your tracks. You cant stop thinking about that image and you feel inspired to do something similar but recreating a particular look whilst still putting your own spin on it can be hard when what you really wish is that you had thought of it first!
By looking at other creative fields you can often come up with something more original because you are not trying to better an existing image of the same style or have any pre-conceived ideas about what the makeup should look like.
I have been wanting to do a shoot with a bike since forever and when I saw Summer's post. 'ten images of inspiration : i want to ride my bicycle' it made me want to follow it through and get planning. Here is a sample of Summer's post but please click the link to see the whole post.
ten images of inspiration : i want to ride my bicycle.
What is it that is so endearing about photographs of cute people with bicycles? I don't know why I love them so much, but I really, really do.


Let me know which sites you visit to get the creative juices flowing and leave a comment!
Related Posts:
Links to Love: FashionFace.tv
Top Ten Blogs To Bookmark
Picture Sources: Olivia Bee, Gemma Booth, About.com (via Design Is Mine)
Friday, 20 March 2009
Links à la Mode
 Links à la Mode is a round up of fashion, beauty and style posts written this week by members of the Independent Fashion Bloggers community. Enjoy!
A Few Goody GumDrops - A Few Goody Gumdrops asks…if you are coming apart at the seems then enter to win torn leggings from LnA!
Breakfast at Saks - Still sifting through Paris Fashion Week shows? Be sure to make time for Ann Demeulemeester F/W 09.10
Capitola Girl Jewelry Blog - Check, Please!
Consume or Consumed - Consume or Consumed Sees Double and Triple: On Buying Multiples
Couture Cult - CoutureCult.com: Alison Lewis (formerly of Mooka Kinney), Spring/Summer 09
Debutante Clothing - Missoni is Inspired By Vintage Modernist Necklaces
Dogmom’s Dish - Desperately Seeking Orla
Fashion Daydream - What your didn’t see at Fashion Week: A behind the scenes look into fashion week, fashionistas en route to the shows and models being made up.
Fashion Pulse Daily - reports on the latest colors for fall 2009 — the season isn’t comprised of various hues of black or even bright colors for that matter either.
Felicia Sullivan - beauty & styling products that work for curly, coarse hair, really work. part 1: frederic fekkai
fete a fete - Larkspur & Hawk’s GORGEOUS antique and vintage inspired
Independent Fashion Bloggers - Burnout Aversion Tips From Bloggers
reLYME - An analysis of the Persian-inspired trend that’s hitting the runway
Retro Chick - Top 5 Ways to have fun with no money
Shopping and Info - Shopping and Info found Gossip Girl scarves bags and jewelry oh my!
Solo Lisa - Sunny fashion picks inspired by Freida Pinto’s character in Slumdog Millionaire
Studio Purpura Fashion Blog - Shopping Hops in the Far & South East Asia! Photos to Come!
Style Symmetry - Check out my interview with Jennine of The Coveted!
Style With Anna - Fashion for Guys: How to Dress Like David Beckham
THE COVETED - Exclusive Video Preview & Tutorial: Benefit Smokin’ Eyes
the musings of ondo lady - Get ready for a retro prequel of Gossip Girl which is about the trials and tribulations of a teenage Lily van der Woodsen
What The Pros Do… - Spring Clean Your Makeup Kit!
Subscribe to:
Posts (Atom)


